Just about everyone would say there is never enough room in their kitchen right? Well I had this problem: I needed more counter space, more cupboard space, a place to put my wine bottles, a place to put all the darn cell phones when they are charging, and a place to put JUNK mail which seems to be eternally flowing at my house.
For me the solution was to build one cart on caster wheels that tried to solve all of these problems at once, and had a rustic industrial look to it at the same time. This particular project was bouncing around in my head for over a year before tackling it. I think I knew it was going to be a bit tricky to pull off even before I started.
The frame is built out of 2×2’s with the outside being made from entirely repurposed materials. Old pallets make up most of this, but there is some reclaimed parts I got from the local
Re-Store. The white pieces on the cabinet door I think were once part of a front porch.
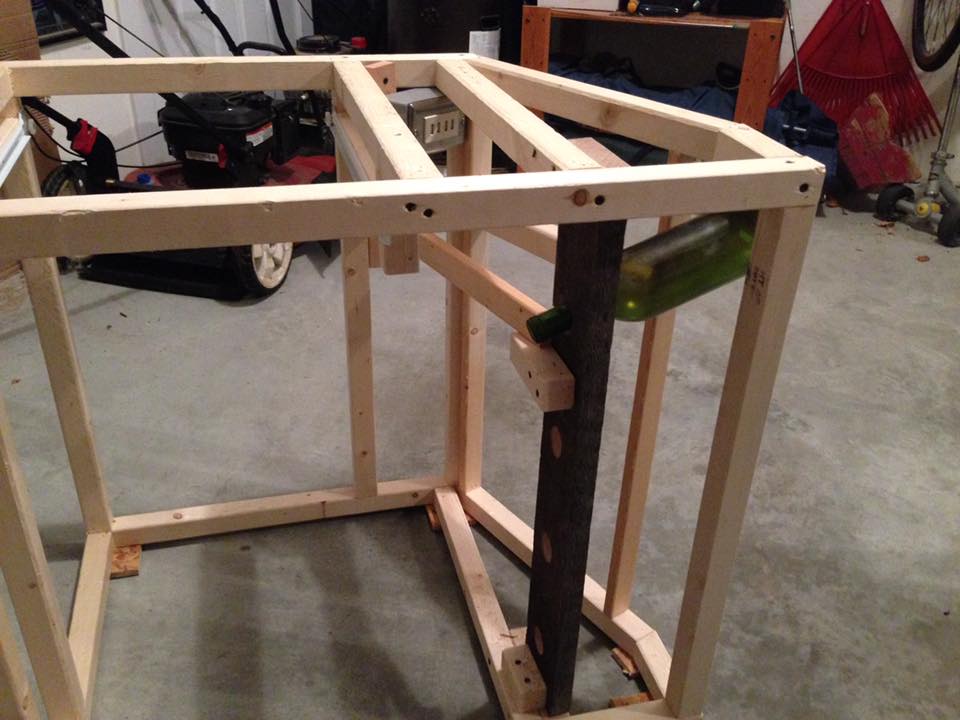
In this next picture you can see most of the frame construction. With the one side having an angle, containing a wine rack, and a storage shelf it took a lot of engineering to get all of this right. I made sure the USB outlet, shelf, and wine rack were working before doing any of the outside pallet work.

The 2×4 holding the wine bottle has 4 holes drilled at an angle and is set back just the right distance so just the end of the bottle sticks out when you look at it from the side.

Here is a second angle
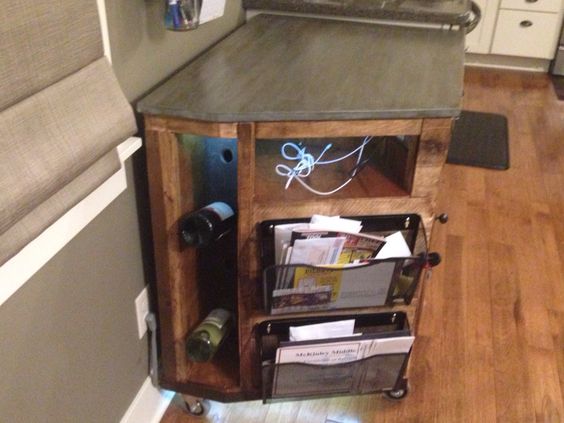
This next picture is the same angle, but completed. The 4 port USB outlet is live anytime the cart is plugged in. The shelf can hold an Ipad Air model along with a handfull of cell phones. This was so that when electronics are charging they don’t have to take up countertop space. A switch on the front of the cart turns on LED lighting in several places on the cart. In this picture you can see both the wine rack and the shelf lit up. Works great for finding phones and cords at night.

2 Folders mounted to the side for handling important papers, in other words junk mail not yet thrown away.
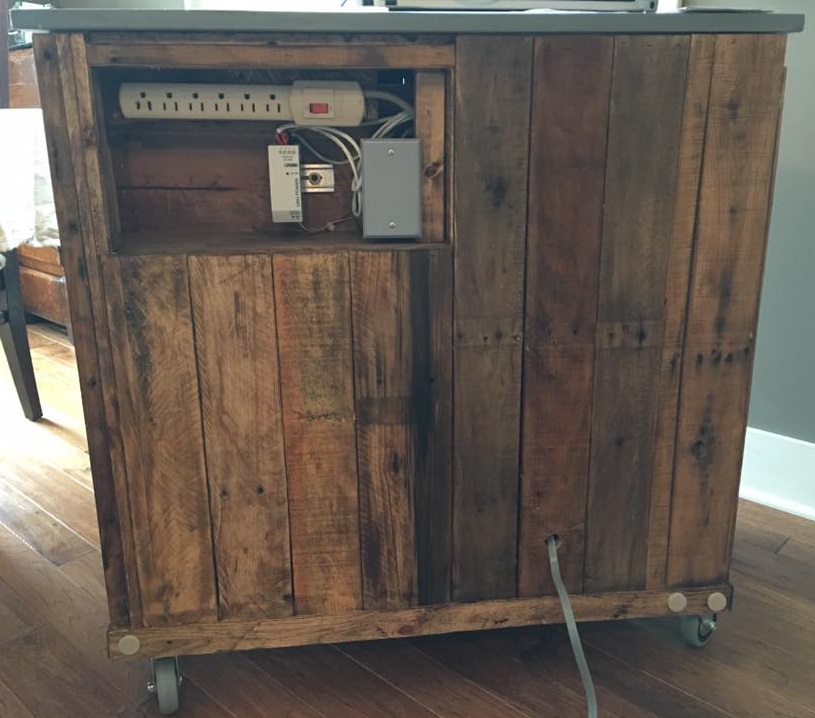
The backside of the cart has a recessed area to handle the power distribution for the 120 Vac and a small DC power supply that drives the LED lighting I used. The power strip is mounted back here so that in the event I need to plug a lot of things in; say for a big party, I have a spot for it all to go. Crock Pots and other electrical devices can sit on the countertop while having the cords neatly tucked back here.

Even the trim boards are pallets.
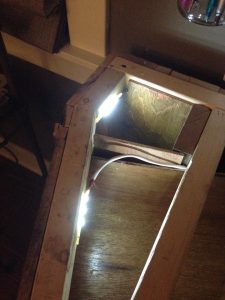
The next picture is a top view of the shelf area, before the countertop was installed. I was very careful to make sure all of the electrical wiring was functional before mounting the top. It would be very difficult to do wiring once the countertop is installed. I used the small LED strip lights that had an adhesive backing to them. In most cases I cut it so that only 3-5 actual lights were in any given spot since they are so bright.
In this frontal picture there is a lot going on to explain. Let’s start with the drawer. Picked it up at an estate sale and put a new face on it. I used the metal hash grating embedded into trim boards similar to past projects.
(More explanation here)The cupboard door are strips of various wood stained & painted different colors all glued together. The steel horizontal piece gives a place to put magnets.
The countertop is one of the few items purchased on this project. It is made of ash wood and with a unique finish that my wife came up with. I used minwax provincial water based stain, with a grey weathered oil based stain. The grey was done first with enough time for it to dry, and then the brown stain was applied over that. It ended up looking a bit like marble stone when done.
The front cabinet door opens to a spacious storage area inside and is also lit. I used an old industrial switch so that the light goes on and off when the door opens and closes.
Four caster wheels are mounted to the bottom giving the cart flexibility for its location. It also works well for accessing the electrical power strip in the back. Two of the wheels are locking so that once in place I don’t have to worry about it rolling around.
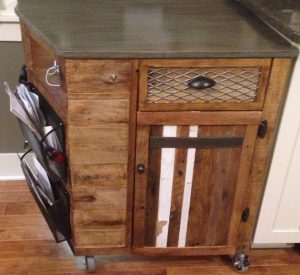
Front View